Open WebUI is an open-source web interface designed for working with various LLM (Large Language Model) systems, such as Ollama or other OpenAI-compatible APIs. It offers a broad range of features that simplify managing and interacting with models. You can deploy Open WebUI on a server or locally on your home machine, essentially creating your own AI powerhouse.
The platform is designed to provide users with an intuitive graphical interface to interact with and manage language models (LLMs). Whether you’re on a desktop, laptop, or mobile device, Open WebUI ensures a seamless experience. Voice interaction is also supported, echoing the conversational style popularized by OpenAI chat interfaces.
Here’s a broader look at what Open WebUI has to offer:
- Flexible Deployment: Run it locally, on a server, or via Docker with support for NVIDIA CUDA and specialized setups for enhanced performance.
- Wide Compatibility: Seamlessly integrate with Ollama, OpenAI APIs, and third-party tools like LMStudio, Stable Diffusion, and Retrieval Augmented Generation (RAG) systems.
- Enhanced Usability: Features include Markdown/LaTeX support, voice/video chat, multilingual interfaces, and progressive web app (PWA) capabilities for offline usage.
- Community-Driven Growth: Open WebUI is actively maintained by a vibrant community of developers and users, continually adding new features and optimizing the interface.
- Model Diversity: Interact with multiple models simultaneously and leverage their combined capabilities for advanced tasks.
Here are 10 tips to help you get the most out of Open WebUI and unlock its full potential for managing and interacting with language models.
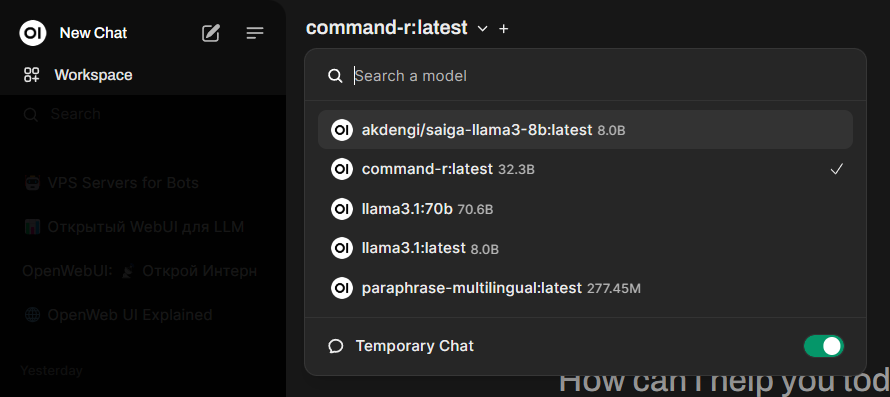
Using Any Ollama-Compatible Model in Open WebUI
Open WebUI allows you to integrate any model compatible with Ollama directly into its interface, making it a versatile platform for working with a wide range of AI models.
To add a model, simply follow these steps:
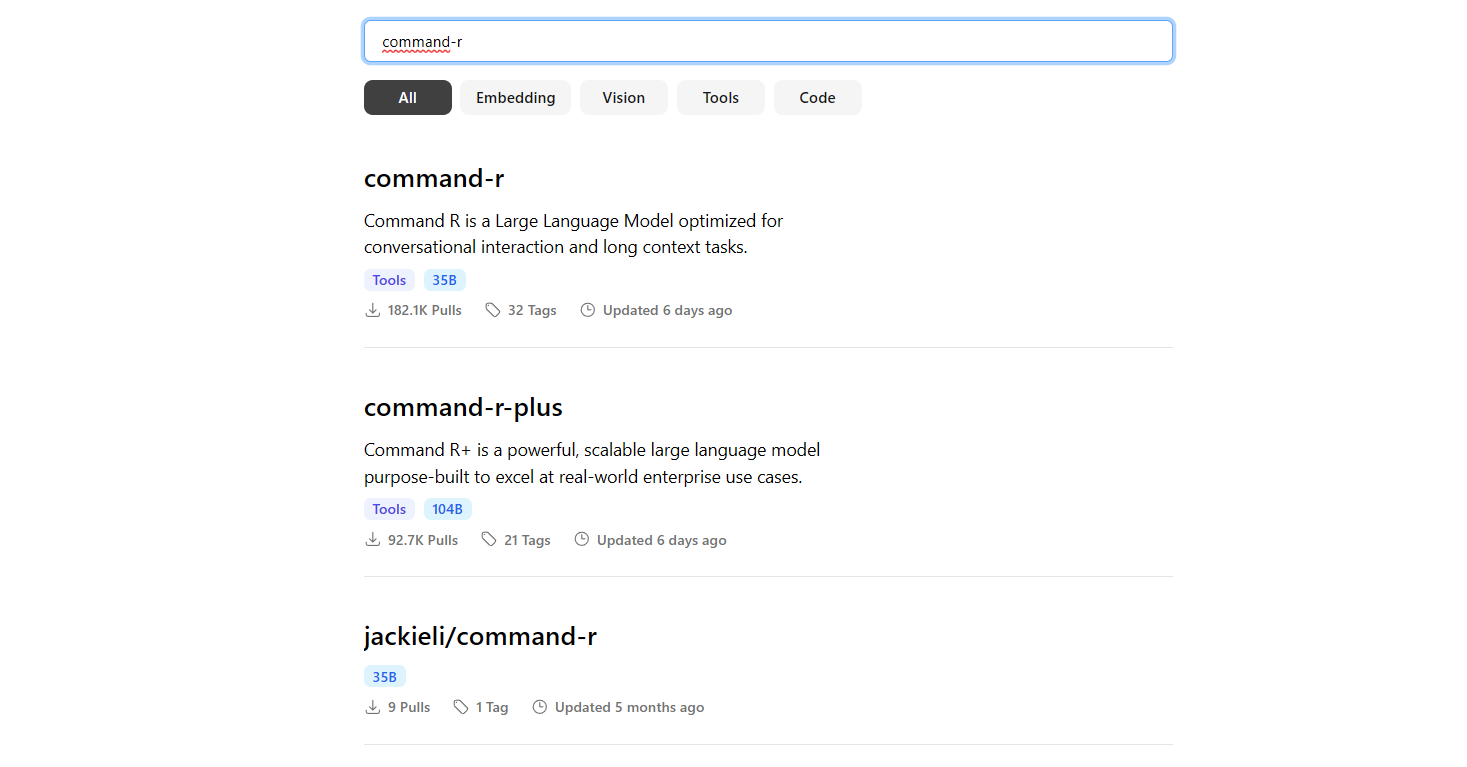
- Visit the Ollama Library:
Navigate to the Ollama model library. - Search for Your Model:
Use the search bar to find the model you need. You can search by name or browse through the list of available models. - Understand the Model Prefixes:
- If a model’s name does not include a prefix before the
/, it is officially provided by the Ollama developers. These models have been verified for compatibility and reliability. - If a model does include a prefix, it has been uploaded by the community. While these models may offer unique capabilities, they are not officially tested or supported by Ollama.
- If a model’s name does not include a prefix before the
- Load the Model in Open WebUI:
Once you’ve identified the model, you can integrate it into Open WebUI by entering the model’s name into the settings or via API commands.
With this approach, Open WebUI enables you to experiment with a wide variety of LLMs, from officially supported ones to community contributions, expanding the possibilities for your AI projects.
Translation with Additional Information
Pay attention to the tags associated with each model: the last tag indicates its size in billions of parameters. The larger this number, the more “powerful” the model, but it will also require more memory. Models can also be selected by type:
- Tools: Models for general-purpose use in “query-response” mode, as well as specialized applications (e.g., mathematical tasks).
- Code: Models trained specifically for writing code.
- Embedding: Models designed to transform complex data structures into simpler formats. These are essential for document search, parsing web search data, creating RAG (Retrieval-Augmented Generation), and more.
- Vision: Multimodal models capable of recognizing uploaded images, answering questions about them, and similar tasks.
Installing Models in Open WebUI
To install a model in Open WebUI, follow these steps:
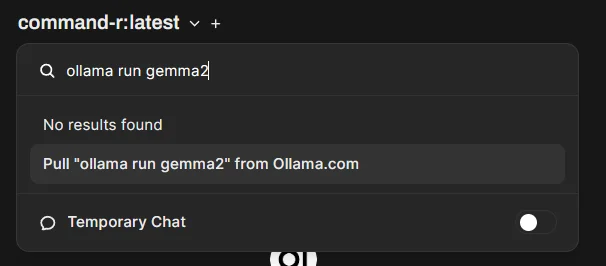
- Open the model’s details page.
- Select the desired size and compression level from the dropdown menu.
- Copy the code, which will look something like:shellCopy code
ollama run gemma2 - In Open WebUI, navigate to the model selection interface. Paste the command into the search bar that appears when you click on the model’s name.
- Click the Pull ollama run gemma2 from Ollama.com option.
The download and installation process will begin. The time required depends on the model’s size. Once completed, the model will be available in your local Ollama setup and ready for use in Open WebUI.
Running Larger Models in Open WebUI Beyond Your GPU Memory
Some users worry that their chosen model might not “fit” into the available video memory of their GPU. However, Ollama (powered by the llama.cpp framework) supports GPU Offload Mode, where the neural network layers are split across the GPU, CPU, RAM, and even disk storage during computations.
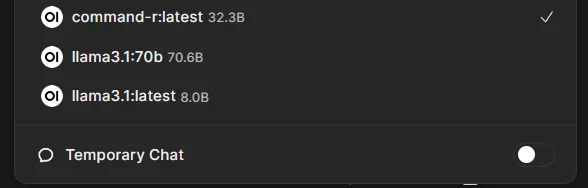
While this approach impacts processing speed, it makes it possible to run larger models. For example, on a server equipped with an NVIDIA 4090 GPU (24GB VRAM) and 64GB of RAM, even a large model like Reflection 70b could run, albeit slowly, generating around 4–5 tokens per second. In comparison, a smaller model like Command R 32bworked significantly faster under the same conditions.
On local machines with GPUs that have 8GB of video memory, models like gemma2 9B can also function properly, although they might operate partially offloaded.
Practical Tips for Efficient Model Usage
- Optimize GPU Offload: Adjust the ratio of layers allocated between GPU and CPU to find the best balance between memory usage and performance.
- Use Compression: Select models with compression options when available to reduce the memory footprint.
- Allocate Sufficient RAM: Ensure your system has enough RAM for offloading processes to maintain stable operation.
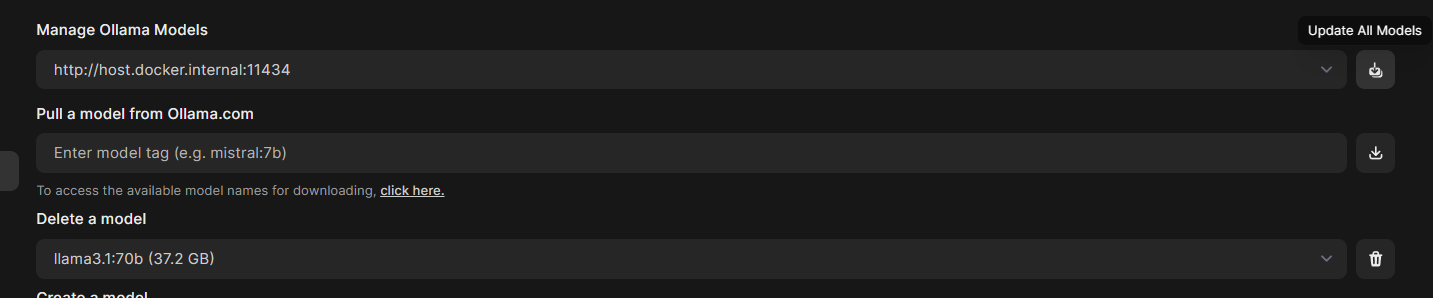
Models Can Be Updated or Deleted Directly in Open WebUI
Ollama models are regularly updated and refined, so it’s recommended to periodically download their latest versions. Often, a model retains the same name but comes with improved functionality.
To update all models downloaded in Ollama:
- Go to Settings → Admin Settings → Models by clicking on your username in the lower-left corner and navigating through the menu options.
- From here, you can either:
- Update all models: Click the button in the Manage Ollama Models section.
- Delete a specific model: Select the desired model from the drop-down menu under Delete a model and click the trash can icon.
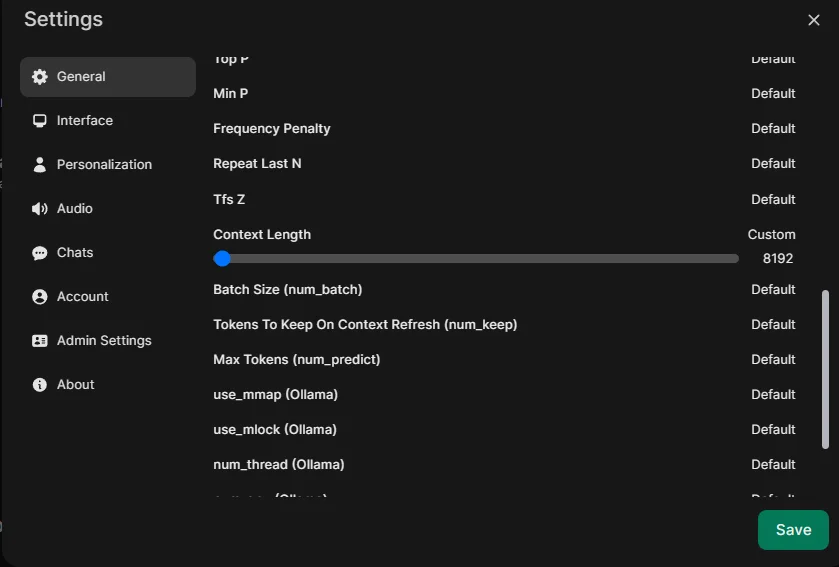
Adjusting Model Context in Open WebUI: Globally or Per Chat
By default, Open WebUI requests Ollama models with a context size of 2048 tokens. This can cause the model to quickly “forget” the current discussion, making interactions less fluid. The same applies to parameters like “Temperature” and others that influence the model’s responses.
To modify these settings:
- For the current chat: Click the settings icon next to your account avatar in the upper-right corner. Adjust the context size, temperature, or other parameters as needed.
Keep in mind:
- Increasing the context size raises the amount of data sent to the model, which can reduce processing speed.
This flexibility allows you to optimize the model for either more detailed conversations or faster performance, depending on your needs.
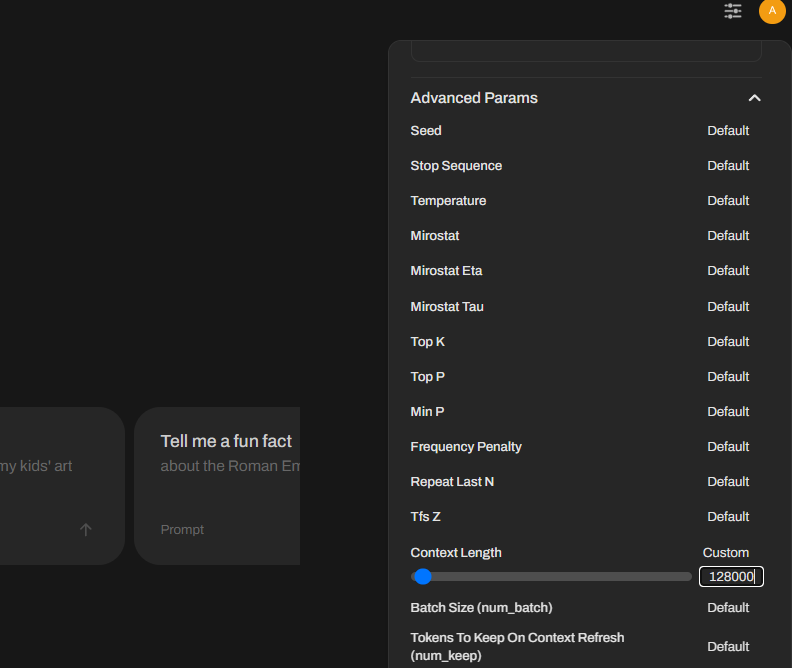
If you’d like to change parameters globally rather than just for a single chat, follow these steps:
- Click on your username in the lower-left corner of the interface.
- Navigate to Settings → General.
- Expand the Advanced Parameters menu by clicking Show next to the label.
- Adjust the desired values, such as context size or temperature, to suit your preferences.
This approach ensures that your preferred settings are applied across all interactions within Open WebUI, streamlining your experience.
Using Web Information in Open WebUI
In Open WebUI, you can instruct the model to use information from the internet to enhance its responses. This can be done in two ways:
- Specify a Website:
- When making a request, include the URL of the desired website in the chat using the
#symbol (e.g.,#https://example.com). - Press Enter and wait for the page to load.
- Once the page is loaded, submit your query, and the model will use the site’s content to generate its response.
- When making a request, include the URL of the desired website in the chat using the
This feature allows for more contextually rich answers by incorporating live data directly from the web.

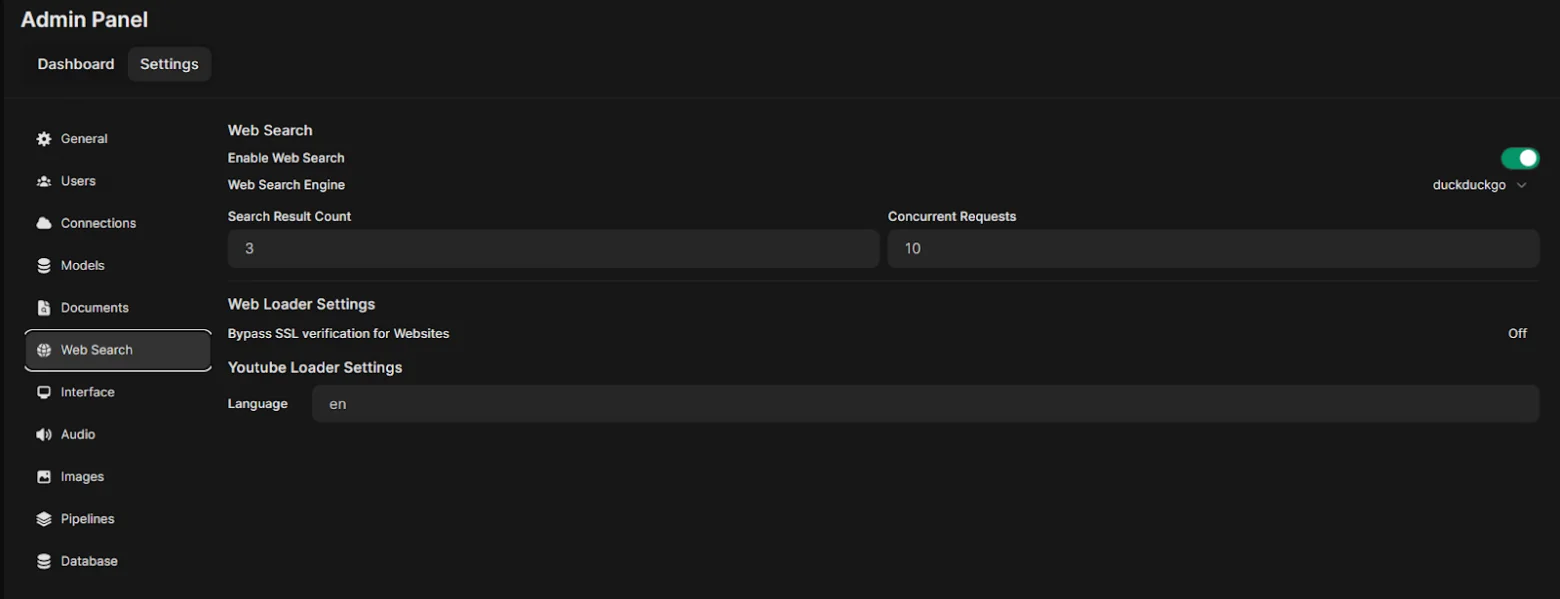
Alternatively, you can enable the model to conduct web searches across multiple sources:
- Configure Web Search Providers:
- Navigate to Settings → Admin Settings → Web Search.
- Choose your preferred search provider (e.g., free options like DuckDuckGo or paid services like Google Search via an API key).
- Input any required API keys or configuration settings.
- After configuring the provider, click Save in the bottom-right corner to apply your changes.
By setting up web search, Open WebUI can fetch live results from the web, making it more versatile for complex or real-time queries.
Once your web search provider is configured, you can enable it for specific chat sessions:
- Enable Web Search:
- In the chat interface, toggle the Web Search switch before typing your query.
- Ask Your Question:
- Enter your query as usual. The model will perform a live search using the configured provider and incorporate the retrieved information into its response.
The web search functionality will remain active for the duration of the chat session, allowing you to seamlessly access up-to-date, web-sourced information.

The only downside is that web searches take some time and depend on the embedding model. If the model is set incorrectly, you will receive the response “No search results found.” If this happens, here’s a helpful tip:
Tip: To improve the search functionality, ensure that the correct embedding model is selected. You can activate or change the model by going to Settings → Admin Settings → Documents, and then downloading or selecting the appropriate embedding model. This should enhance the accuracy of web searches and document retrieval.
Search functionality for documents and websites in Open WebUI can be improved
By default, Open WebUI uses the SentenceTransformers library and its models. However, even these need to be activated. To do this, go to Settings → Admin Settings → Documents and click the download button next to the model name under Embedding Models.

It’s better to set the Embedding model directly in Ollama, as this significantly improves the quality of document and web searches, as well as the formation of RAG. Instructions on how to do this are provided in Tip #1. We recommend using the paraphrase-multilingual model. After installing it in Ollama, go to the section mentioned above and change the Embedding Model Engine to Ollama, and set Embedding Models to paraphrase-multilingual:latest. Don’t forget to save your settings by clicking the green Save button.

In Open WebUI, you can quickly enable temporary chats that are not saved
By default, Open WebUI saves all user chats, allowing you to return to them later. However, this is not always necessary and can sometimes be disruptive, especially during tasks like translations. To avoid cluttering the interface with saved chats, you can enable the Temporary Chat mode. To do this, open the model menu at the top and toggle the Temporary Chat switch to On. If you want to return to the regular chat saving mode, simply turn off the Temporary Chat option.
You can install Open WebUI on Windows without Docker.
Previously, working with Open WebUI on Windows was challenging since the panel was distributed as a Docker container or as source code. However, now you can install it on Windows (after installing Ollama) using pip.
To install, make sure you have Python 3.11 (specifically version 3.11) and run the following command in the Windows command prompt:
bashCopy codepip install open-webui
After installation, start Ollama, then enter the following in the command prompt:
bashCopy codeopen-webui serve
Now, open the web interface in your browser by navigating to https://127.0.0.1:8080.
If you encounter an error when starting Open WebUI like:
vbnetCopy codeOSError: [WinError 126] The specified module could not be found. Error loading "C:\Users\username\AppData\Local\Programs\Python\Python311\Lib\site-packages\torch\lib\fbgem.dll" or one of its dependencies,
You can download and copy the libomp140.x86_64.dll library to your /windows/system32 folder from this link: Download libomp140.x86_64.dll.
The only downside to this solution is that Open WebUI may conflict with applications that require a different Python version (for example, the WebUI-Forge clone “broke” in our case).
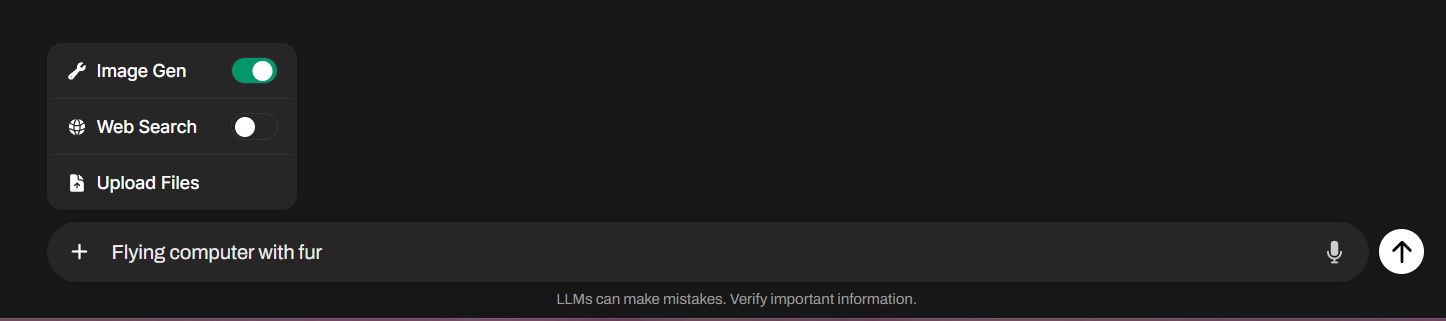
In Open WebUI, you can generate graphics
To do this, you will need to install the Automatic1111 web interface (now called Stable Diffusion web UI) and the necessary models (refer to the instructions), and configure it to work with Open WebUI.
For convenience, you can add a generation button via external tools (Tools) directly in the user’s chat, rather than using repeat and generating it in response.
To set this up, visit https://openwebui.com, then register on the site and go to the Image Gen tool. After clicking on the Get button, enter the URL of your installed Open WebUI, and then import the tool by clicking Import to WebUI. This will add the code to Workspace-Tools, and all that remains is to click Save in the lower right corner.

If you have correctly set up access to image generation via the API, you can enable the Image Gen toggle in the chat by clicking the plus icon. This will allow you to send a request directly to Stable Diffusion. The old method of generation via Repeat will continue to work as well.
In Open WebUI, you can recognize images
Open WebUI supports working with vision models that can analyze images in pictures. To use this feature, select and install a vision model, such as llava-llama3, as described in previous tips. Then, by clicking the plus icon in the chat box and choosing Upload Files, you can upload an image and ask the model to analyze it. Afterward, you can feed the result to another model for further processing.
In reality, this is just the tip of the iceberg: the functionality of Open WebUI is much broader. It ranges from creating custom models and chatbots, and accessing them via API, to automating work with LLMs using tools and features (such as Tools and Function), which allow you to filter user queries, block unwanted content, create processing pipelines with multiple sequential models, clean output code from garbage, or even play Doom! If you’re interested in learning more about this, let us know in the comments.
Read more abbot Open WebUI on our Blog.